Floor Covering For Just Pennies
By Melissa Wynn
When Juan and Ashlee Herrera bought their fixer upper, flooring was one of the projects on the must-have list. As Ashlee searched the web for an original idea for her kitchen she stumbled across the idea of using pennies as floor cover, suggested on a popular website.
As the remodel was in progress, friends and family, along with the Herreras, gathered pennies from purses, coin jars and long forgotten piggy banks. It takes a lot of tiny pennies to cover a kitchen floor. Evenings and weekends found our young 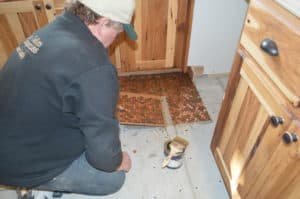 family around the dining room table gluing pennies to one foot squares of wax paper that they had previously spray painted black. Of course you could paint your wax paper squares any background color you like. White or metallic copper would look great as well.
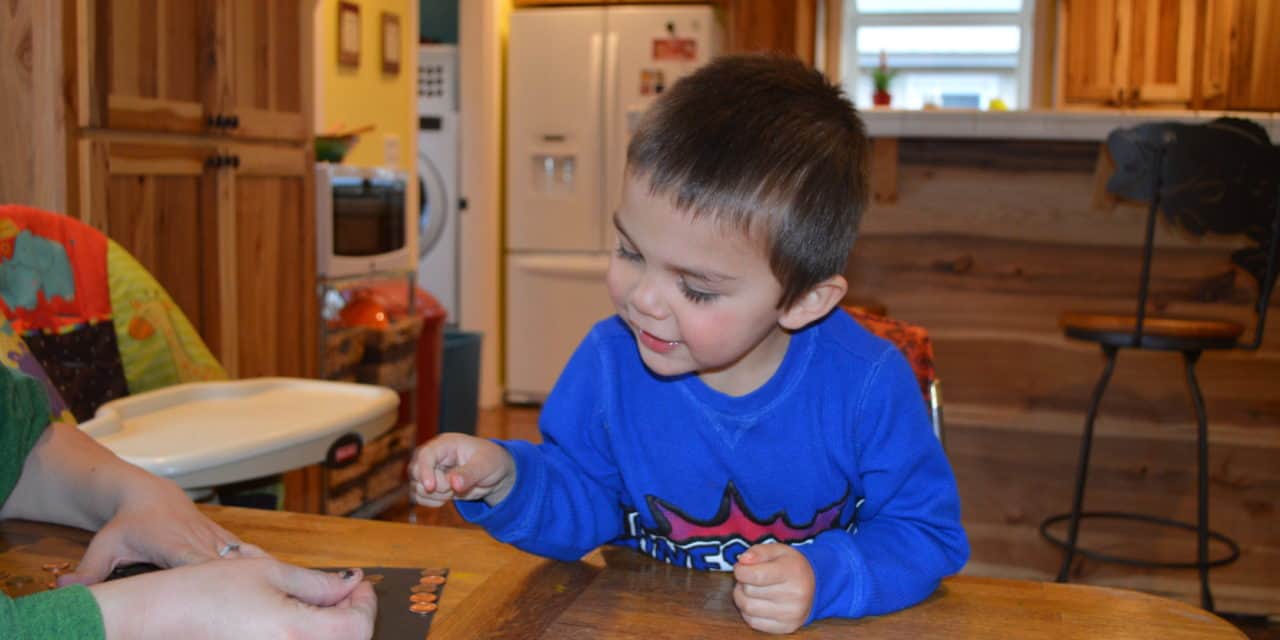
Even little Mateo Herrera helped make these tiles while learning a bit of history. At just two years old he learned that Abe Lincoln is the face on every penny, that he used to be president and is famous for freeing the slaves. He was happy and proud to share his new found knowledge with Mountain Valley Living magazine. The final tile was made of pennies and pesos. The pennies comprised the edges while the pesos were used to create the “H” monogram for Herrera. This tile holds the honored center position of their new kitchen.
Each tile requires $ 1.92 to fill the space so the process is time consuming, but the stunning final product will last forever. The outer edges of each tile are staggered so that as two tiles are slid into place they will interlock. As the tiles were finished the Herreras carefully stacked them between pre-cut cardboard in milk crates for storage.
The day before tiles were to be laid they spread the tiles across the sub floor to make absolutely certain that their estimated count was correct. The penny tiles adhere to the floor using a polyurethane adhesive that sets in just 90 minutes, so you must have all your tiles prepared when the glue goes down. Because the Hererras chose black as their background color, they also painted the sub floor black prior to laying tiles to ensure that anywhere that needed trim, the black background would show through. In the end their seemingly modest sized kitchen required 148 tiles for a total of $284.16. With edges and filler they 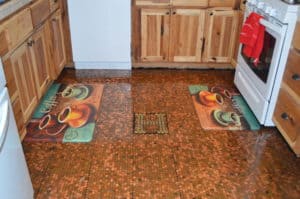 guessed that the number of total pennies was closer to an even $300.
Once the epoxy was mixed, Ashlee and her Stepfather, general contractor Cal Thurber of CST Inc, started in the far corner, interlocking tiles and working their way toward the center of the room. Juan and Tracy Thurber (Ashlee’s mother) of Plumas Bank, started at the far end of the small walkway between the breakfast bar and the dining room and soon both groups had their section nearly covered in pennies. After these bulk areas were completed it was time to finish up the edges and any spots that still needed a filler penny here and there. This they accomplished just the way one would imagine. That’s right, one penny at a time carefully placed to give the floor that even and finished look.
After drying overnight, the pennies were in their forever home and ready for the epoxy clear coat. Three coats of clear epoxy left the Herreras with an amazingly shiny kitchen floor, ready for years of scrubbing and all that a kitchen floor endures while raising two energetic boys.
Home décor can be anything you want it to be. Surf the web and ask around. You might just come across an idea that grabs your fancy just like Ashlee Herrera did. Happy remodeling!


